
—————
Quick context: I’m building a camper conversion Ascent and have already removed the second row, built a floor, complete with fridge and running water. The challenge with the Ascent’s limited space was finding a place to put the auxiliary battery.
The extension cable that runs from the car battery to the rear of the cargo was not long enough to mount the battery on the passenger side. So I was forced to embrace a design that would have the battery on the driver’s side. The only thing is that there is AC/heater ducting, raised about 2.5″ off the floor, so for anyone trying to custom build, be aware of that!
I started by taking measurements of the space, and for this I used foam board (you can buy really large sizes at Michael’s – just go to the framing section and ask). I trace the space using smaller pieces, tape them together, and then transfer the outline to a second piece of solid to ensure the fit. Then I transfer it to the wood. This process adds a seemingly unnecessary step, but placing the template on 1 solid piece will give you a 99% accurate idea of how the wood will behave. Great for ironing out small bends.
It also helps you find bottom bolt holes that would otherwise be impossible to measure. Simply drill a hole through the foam and trace it into the wood. Voila!


(Not pictured) – I ended up cutting the inner bumper step trim flange flush with the inside of the cargo area. This is the flange/lip that the OEM floor/hard cover rests on. This allowed me to mount a piece of hardwood flush with the inside of the bumper. (It’s the white rectangle template in the image below)

I got all the wood pieces traced and cut, and tested on the back with the battery. Due to the length of the battery cable, I had LOT tight tolerances on exactly where the battery can go. This meant a lot of measuring, noting, measuring, noting, etc.

Once I felt good about everything, I exposed the birch to the automotive cargo liner (I used this for the whole project, as it has a liquid absorbent backing).
You can see the space I cut out of the template to avoid the AC/heater duct.

Obviously, there are no bolt thread holes in the floor. It’s just sheet metal with holes (about 1/2″ in diameter). This is the tricky part: There is NO way to get into the space below the holes, it’s a cavity sandwiched between two sheets of metal, with the spare wheel way down. For to overcome this challenge, I used 1/4-20 drywall anchors (120 lb rated). The anchors go through the holes (with a little bit of grit required), widen at the bottom, catching underneath and allowing for a safe.

I actually had to use my phone, in conjunction with my Apple watch, using the camera app as a monitor. I slide the phone next to the panel, pointing down, then use my watch to find the bolt. Here’s the view from the camera:

I used a rubber mallet to get the force needed to push them in, and it worked great! I had two bolts on the passenger side, one on the driver side. Tighten the floor, bingo!

Once the floor was in, I just built it up as a platform, using small 1/2″ corner brackets to mount everything up.
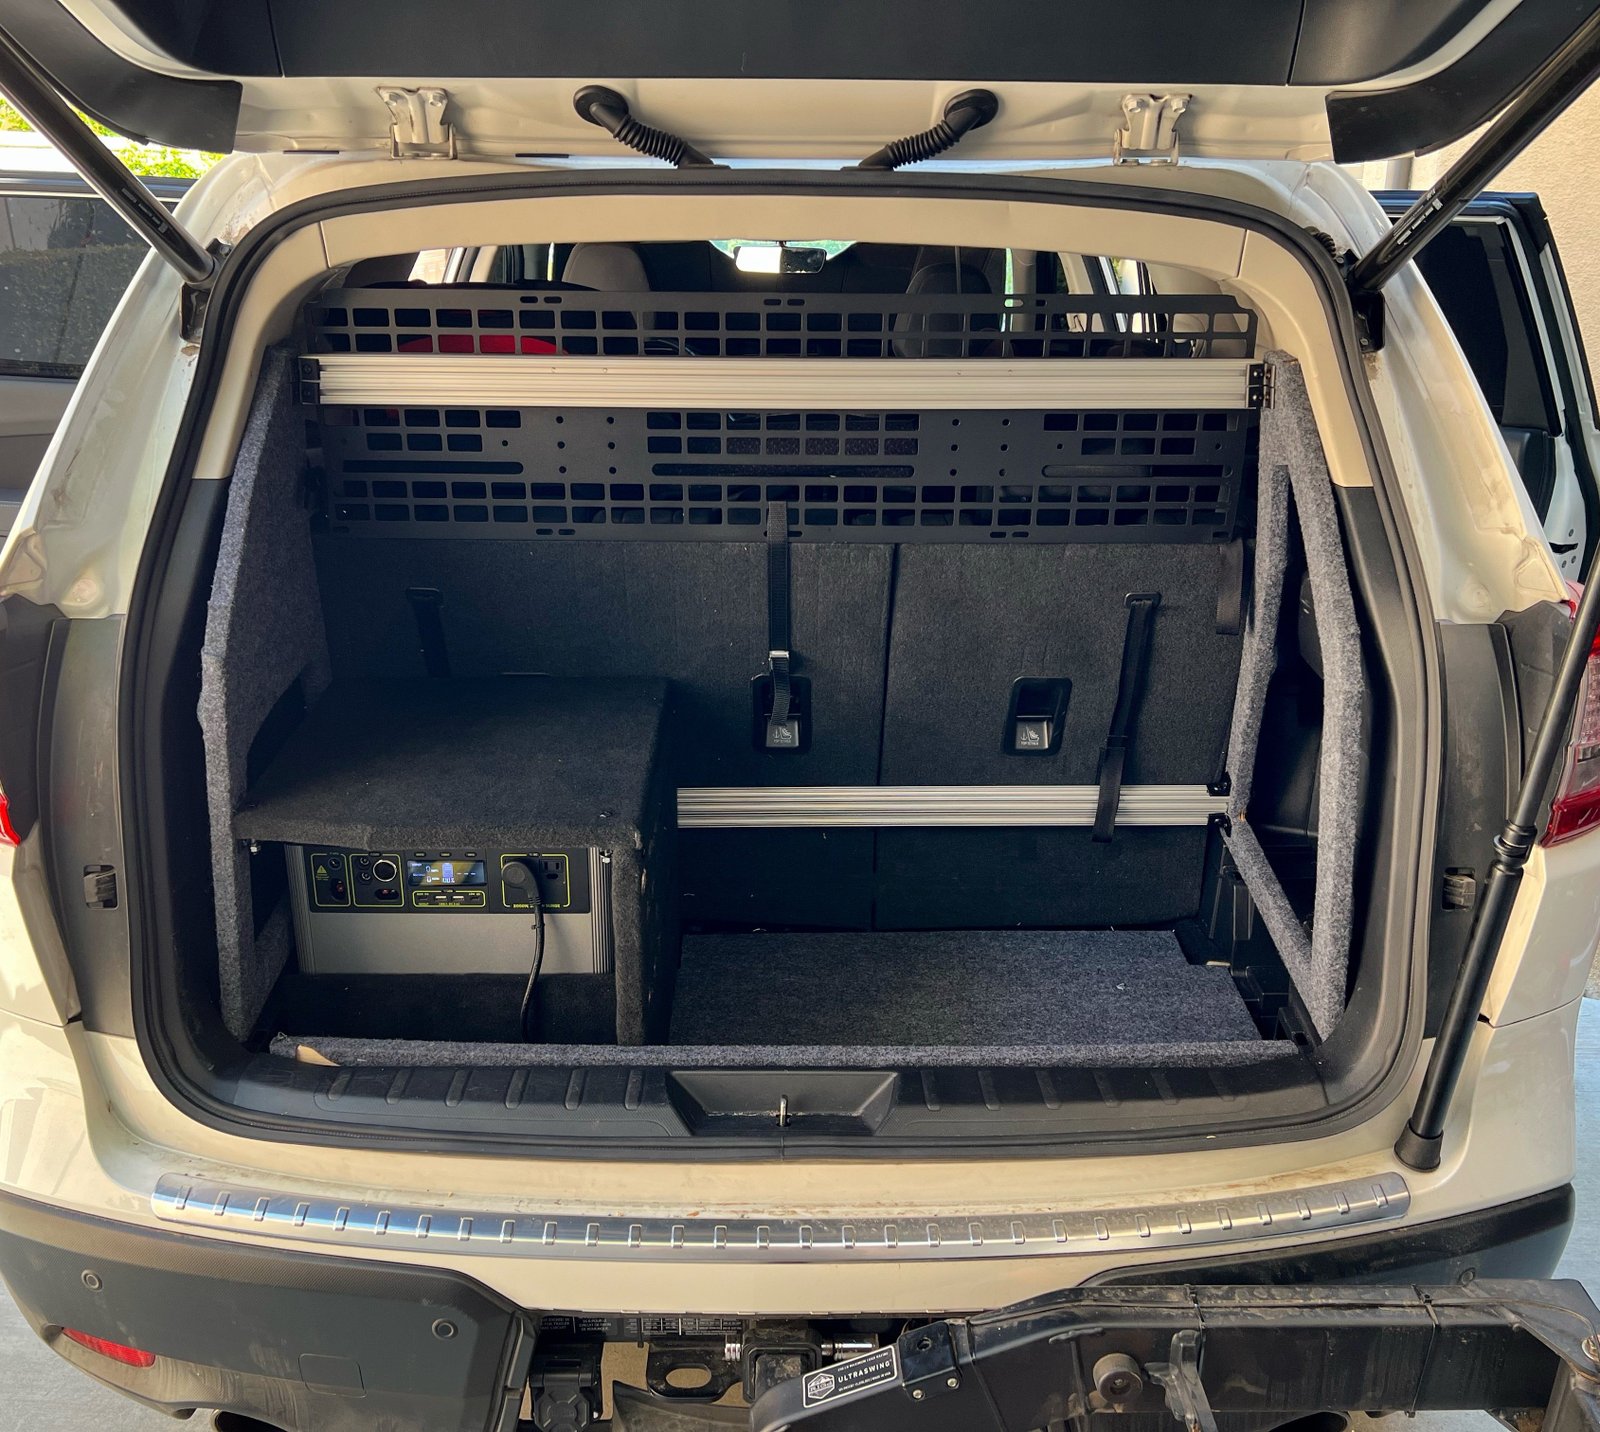
I secured the battery box, which is a small raised box to clear the AC/heater duct, and then a wall with holes + removable cover. This allows for easy enough access if I ever need to pull the battery out to charge elsewhere, but also a sturdy enough structure to stack gear on top of it.
I have used the small cavity in front of the battery box to store the 30A > 15A surge protector, extension cable, etc. I’ll use the space to have a small spot for the tailgate bar, latch catch, toolbox, bottle holder, and anything else I need quick access to.

“Finished product!
My favorite part of this, is that once you close the hard floor, the world is your oyster. Build whatever you want, in any configuration, infinitely modifiable. Who knows, maybe after this big trip we’ll add shelves, drawer slides, folding table, etc.?
See you there ✌🏻


